EDC Photography:
Part 2: Lighting
Series Contents:
-
Introduction
-
Part 1: Composition
- Part 2: Lighting (You’re Here!)
-
Part 3: Color
-
Part 4: Post Processing – Global Adjustments
-
Part 5: Post Processing – Local Adjustments
-
Part 6: Post Processing – HSL
Lighting is probably the most important thing in photography. No matter what you are photographing, if it is being lit well it will be more pleasing to the eye than a dark room in which you can barely see anything to begin with.
Everything we see is light that is being manipulated by different shapes and textures. We can make use of that fact to play with light in order to enhance our image and make it more flattering. You can use it to add more contrast, more depth, accentuate an object’s shape or take attention away from it. The things you can do with lighting are limitless.
Also, bright pixels are sharp pixels. A well-lit image will appear more crisp even if it’s not technically 100% in focus.
The human eye will always look at the brighter parts of an image first and then go to the darker areas. You can use this to guide the viewer’s eye to where you want them to look. Therefore, it’s a good idea to have the main object in the brighter areas of a photo. You can enhance focus by making the surrounding areas dimmer, which effectively takes away attention from areas that are of secondary nature.
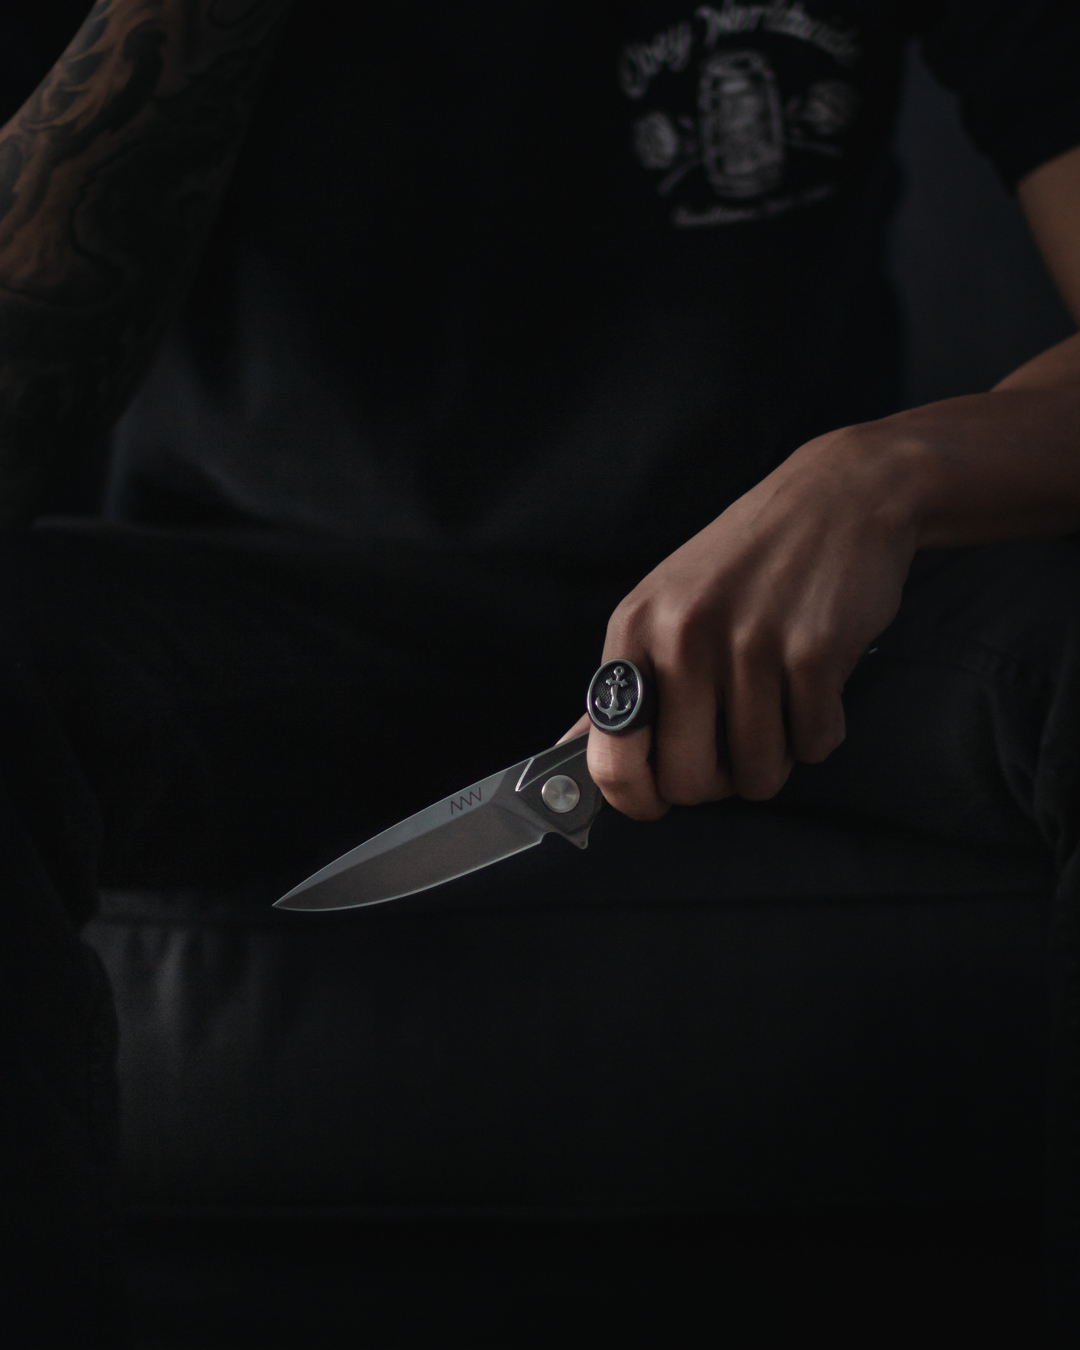
Image by @raven_the_pirate
Image by @raven_the_pirate
In these pictures the only light source is a window right next to the subject. I opened the curtains just enough so the light would only hit the hands, keeping everything behind them in the dark. Putting something in front of objects to cast a shadow on them (in this case the curtains) is called “flagging” and can be very useful to direct the light.
Light can be categorized into hard and soft light. While hard light will create very contrasty images with sharp and dark shadows, soft light is usually more pleasing on the eye and more flattering in general.
Hard Light vs. Soft Light
Have you ever pointed a flash light at a wall to make shadow puppets with your hands? That’s a hard light. The smaller the light source and the more directly it hits an object, the harder the light will be. What makes hard light so difficult to handle is that the brightness levels in the image will be very extreme: light areas will be very bright; shadow areas will be very dark. Even the transition between those areas is very drastic which creates an image that is hard to control and sometimes even hard to look at.
A soft light on the other hand will light your image more evenly with smooth transitions between light and dark areas. This will let you have more control over the lighting situation and creates a more flattering look.
How to Get Soft Light
The bigger the light source and the more diffused it is, the softer the light will be. Here are a few examples to help you understand what that actually means:
A camera flash is usually a very small and hard light source. However, in this picture I pointed it towards a big white wall to the left of the image which illuminates the entire wall and turns it into a very big (indirect) light source (which in turn creates soft light). Notice how smoothly the light wraps around the handle of the knife and how soft the shadow that is being cast on the other knife appears.
This picture of the hand was taken on a rainy day, which might not be a great day to be outside, but it makes for the perfect lighting scenario. The clouds were being illuminated by the sun which basically turned the entire sky into a huge diffused light source. The light it creates is very even and soft, while still being super bright.
If you’re shooting at home and don’t have a flash at hand the best thing you can do is move to the window. The window itself is a fairly big light source with mostly indirect sun light, so the light that comes in is diffused already (try not to let the midday sun shine in directly).
If you want to check out some IG accounts that use good lighting to create amazing pictures check out @erinsedc, @rambler.made or @_jamesy_boy.
Next stop: Color!


5 thoughts on “EDC Photography: Part 2 – Lighting”